Sunday 30 October 2016

Rice Crackers recipe

I had been eating commercial rice crackers, and didn't like all the preservatives, etc. in them.  So I started looking for a recipe to make my own, and found this recipe for easy to make rice crackers at Little House Living.  I have the rice flour blend on my site, but for some reason it won't let me add a link to it.  You can find it by using the search box on the top left hand corner of this site.

Brown (or White) Rice Crackers

Makes a couple dozen

Ingredients


  • 1 cup Rice flour All Purpose Gluten free flour blend
  • 1 tablespoon butter, melted
  • 1 teaspoon olive oil
  • Pinch brown sugar
  • 1/2 teaspoon sea salt
  • water
Method


  • Mix together the flour, butter, olive oil, sugar, and salt, using a fork.
  • Add water slowly (about 1/3 cup, total), mixing with your hands until it forms a nice dough.
  • Place the dough on a greased baking sheet, or stoneware baking sheet.  Cover with a piece of waxed paper, and roll the dough out very thin - 1/8" or thinner.
  • Score the crackers in the size you'd like.
  • With pastry brush, apply melted butter, and sprinkle with sea salt.
  • Bake at 400º F for about 15 minutes, or until the crackers are crispy and slightly brown.
Variation:  Add 2 teaspoons of flax seed, poppy seed, dried herbs of your choice, etc.


This is a lovely cracker to eat with soup, or any other time you want a cracker!  

Rice Flour All Purpose Gluten Free Flour Blend

When I stopped eating gluten, I naturally looked for gluten free substitutes, and I discovered this all purpose Gluten Free Flour blend at Little House Living.  It has 3 basic ingredients, and I used it successfully as a straight substitute for wheat flour in several bar recipes that first Christmas.


Rice Flour All Purpose Gluten Free Flour Blend


  • 2 Cups Brown or White Rice Flour
  • 2 cups Sticky Rice Flour
  • 1 cup Potato Starch (not potato flour)
Whisk all ingredients together until well blended.

The sticky rice flour works as a binder in this recipe - like a gluten substitute.  If you can tolerate rice, then this works well for bar recipes, and crackers.  I didn't try it for other things because I discovered that in addition to gluten, my body doesn't like rice.

Here's a few more pics of bars I made using this blend in regular bar recipes.  They were deemed delicious when I brought them for Christmas!


Thursday 13 October 2016

Oatmeal Buttermilk Drop Biscuits

I've tried a few times to create a recipe for gluten-free biscuits that you pat out and cut, but no success so far.  Part of the problem is that I can only use a few of the gluten-free flours - oat flour and corn flour being my favourites - and I prefer to use them without additives like Xanthan gum etc.   I decided making drop biscuits might work better, and I am very happy with this recipe.  I used oat flour along with a little potato starch, and cut the amount of butter that would be in a regular recipe since gluten-free flours don't absorb fat the way wheat flour does.

Oatmeal Buttermilk Drop Biscuits

Makes 1 dozen

Ingredients

  • 1 cup buttermilk
  • 1/4 cup butter, melted
  • 2 cups (200 gm) gluten-free Oat flour
  • 1/2 cup potato starch
  • 1 tablespoon cornstarch
  • 1 tablespoon baking powder
  • 1/2 teaspoon sea salt
  • 1/4 teaspoon baking soda

Method


  • Put the oven rack in the upper middle, and heat the oven to 450º F.
  • Weigh out the flour, or spoon it into a measuring cup.  Never scoop oat flour out of the package with a measuring cup.  It will compact, and you will get more flour than you need.  
  • Mix together the buttermilk and melted butter.
  • In a large bowl, whisk together the dry ingredients until well combined.  Oat flour, baking powder and baking soda can all clump a bit.  Make sure to press out any of these clumps between your clean fingers.
  • Add the wet ingredients to the dry mixture and stir until just mixed.
  • Using lightly greased tablespoons, drop 1 tablespoon worth of dough per biscuit onto an ungreased cast iron frying pan (9 or 10"), or cake pan.  I found that the biscuits held their shape best in the cast iron pan.


  • Bake until the tops are golden - 20 - 25 minutes.  Check after 20 minutes.
  • Serve warm with butter.


These biscuits are very tender, and they freeze and reheat well.  I really enjoyed them with my soup, and they'd be great with stews or chilis.  

Monday 10 October 2016

Harvest Time

A week ago, I was digging a few carrots to put in a batch of sauerkraut I was making that day.  It was a lovely sunny day, and I briefly thought "Maybe I should dig all the carrots today".  But it was already a full day, and I didn't think I had the time to dig, clean, and bag all the rest of the carrots, too.  I decided to wait one more week.  That turned out to be a mistake!  Just a few days later we had a foot of heavy wet snow.  SIGH!

The forecast was talking about some double digit temps in another week, and I thought I would wait for that.  But I realized that it wouldn't be much better because I'd be digging in mud.  So yesterday, I dug up my carrots from under their snow cover.  At least the wet soil made it easy to dig them out.  And I got the very clever idea of wearing a pair of heavy duty rubber gloves for the job.  The worst part of digging carrots in snowy wetness, is how cold and muddy your hands get from having to break off the tops -  the rubber gloves did a great job of protecting mine.

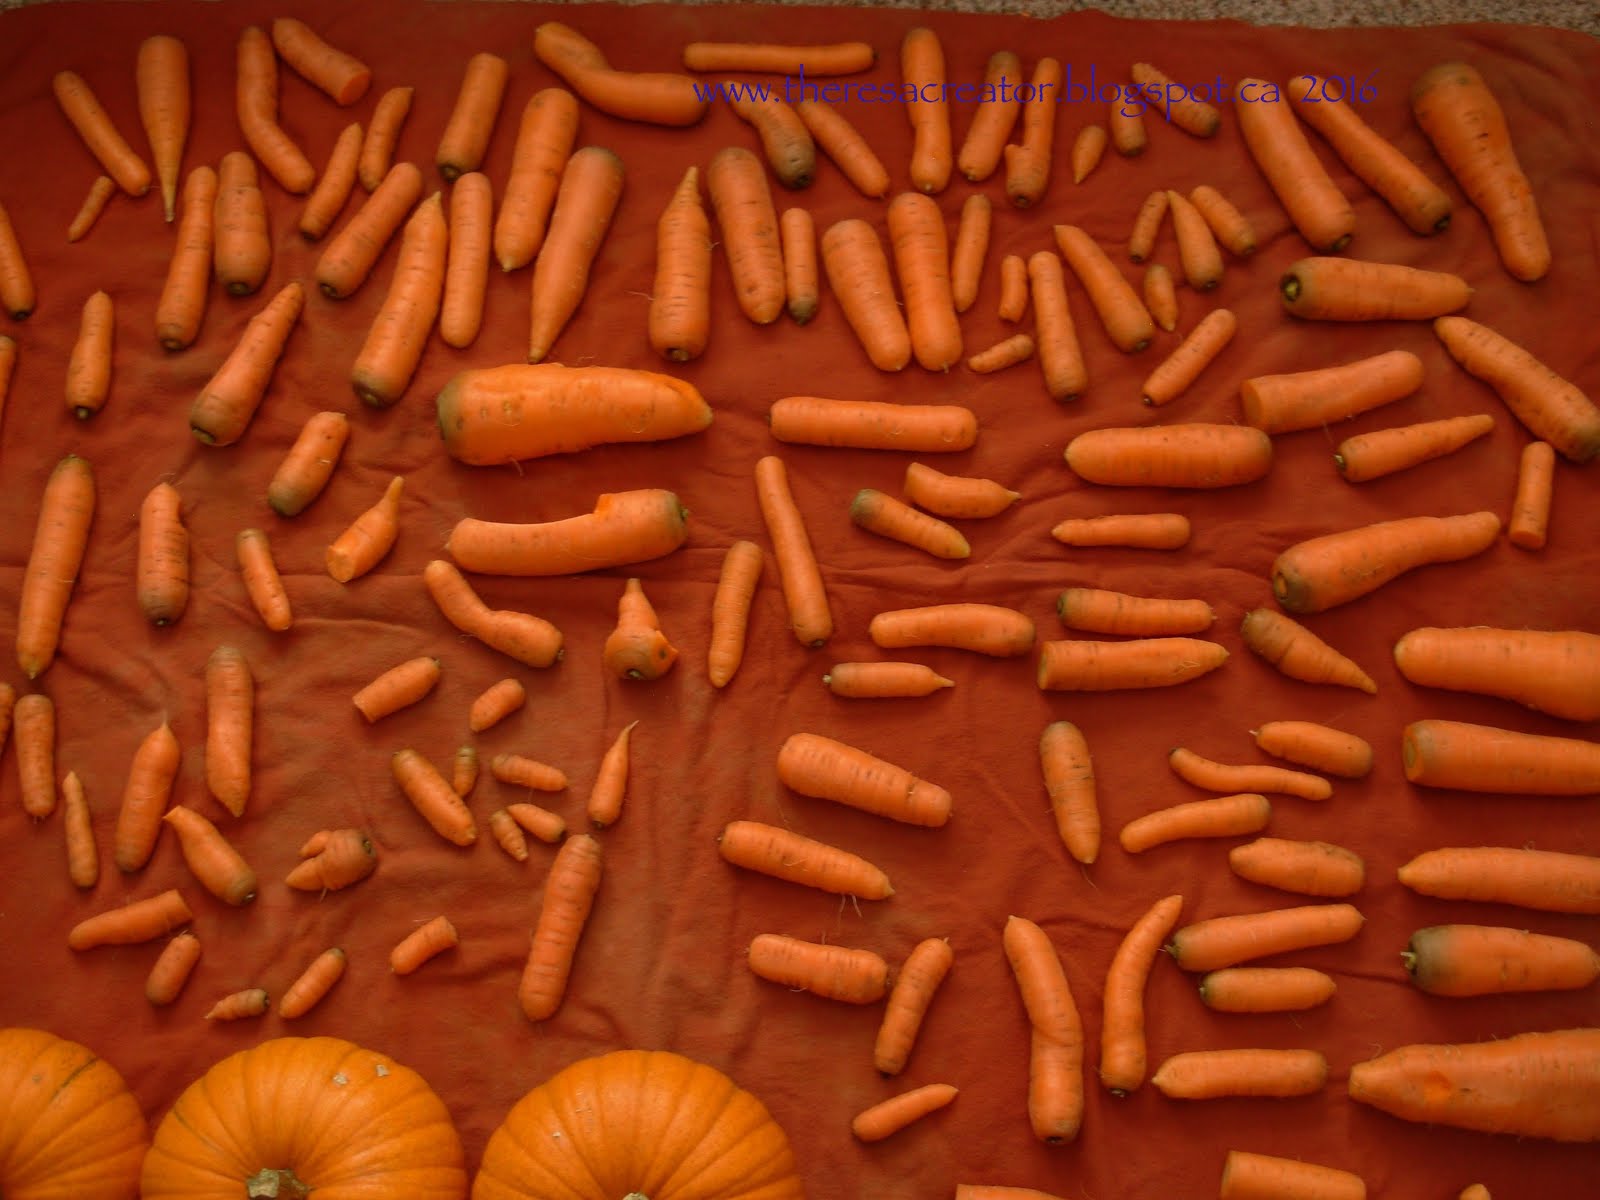
I managed to get the pails of muddy carrots home without messing up my car too much.  Then the next couple of hours were spent washing all the mud off.  Here's a pic of the carrots drying on a flannel sheet.  You can see my 3 pumpkins along one edge.


I had already given some carrots away because I only have some much storage space, but my cousin kindly allowed me to store the remaining 4 bags in her extra fridge.

Here is the sauerkraut - you can see that fermentation is causing stuff to seep out along the edge.  That's natural, and the reason I have the jars sitting in ice cream pails to catch any seepage.


I also decided to ferment some other veggies, in this case onions, carrots, and celery.  Since there is no cabbage in it, I fermented them in a brine solution.  I have been enjoying having a little sauerkraut in my salad, and thought some fermented variety would be nice.  In terms of adding stuff like fresh ginger, onions, or hot peppers in my ferments, I have discovered that a little goes a looong way.  Too much and it can be overwhelming.


The cabbage I bought at the farmer's market was very large, so I had enough to make 3 litres of sauerkraut.  It makes such a difference when the cabbage is fresh and full of juice!  The process of making sauerkraut goes so much faster than at the end of winter when your choice of cabbage is drier.


This takes up a fair amount of space on my counter, but it's only for a week or so, and then I have enough veggies to last for months - yay!  Now, the only thing I really have left to deal with from harvest time is my pumpkins.  They were still green when I bought them from a local organic gardener, but are now a lovely shade of orange and ready to go.  However, that really can wait another week, and I think I deserve a break today.  Gonna have a Thanksgiving chicken with potatoes, gravy, etc.  And I made a little pumpkin pie from last year's frozen pumpkin puree....